

It started with a simple sentence. “We really need a new kitchen floor,” I said to my husband. A month later, I find myself in the middle of an entire first floor home renovation.
I’d been worried about the kitchen ceiling ever since the day we moved in. Made from layers of plaster that were more than 2 inches thick, I feared that an earthquake might someday drop the whole thing onto my head. But removing all of that plaster was a bigger job than my husband and I could deal with ourselves. And so for the past 20 years, we’d ignored the problem.
But now we are lucky to have a “handy” son-in-law. When I mentioned installing a new floor, my husband suggested that it would make sense to deal with our ceiling issue first and my daughter volunteered her husband for the job! Bill brought in a crew and within a few hours they removed all of the plaster and lathe. In order to install the new drywall ceiling, cabinets had to be removed from the walls which meant that cabinets, as well as all their contents, had to be stacked in adjacent rooms. My dining room and breakfast nook became storage centers stacked high with kitchen things. My front porch had to be cleared in order to make room for tools and supplies. Furniture from the porch was also squeezed into the dining room. What didn’t fit was pushed into the living room. In the kitchen, the work crew continued, reinforcing beams and hanging new drywall. A layer of dust spread throughout the house despite the care taken to seal off doorways with sheets of plastic. I ordered 40 unfinished tin ceiling tiles from an on-line manufacturer in Florida.


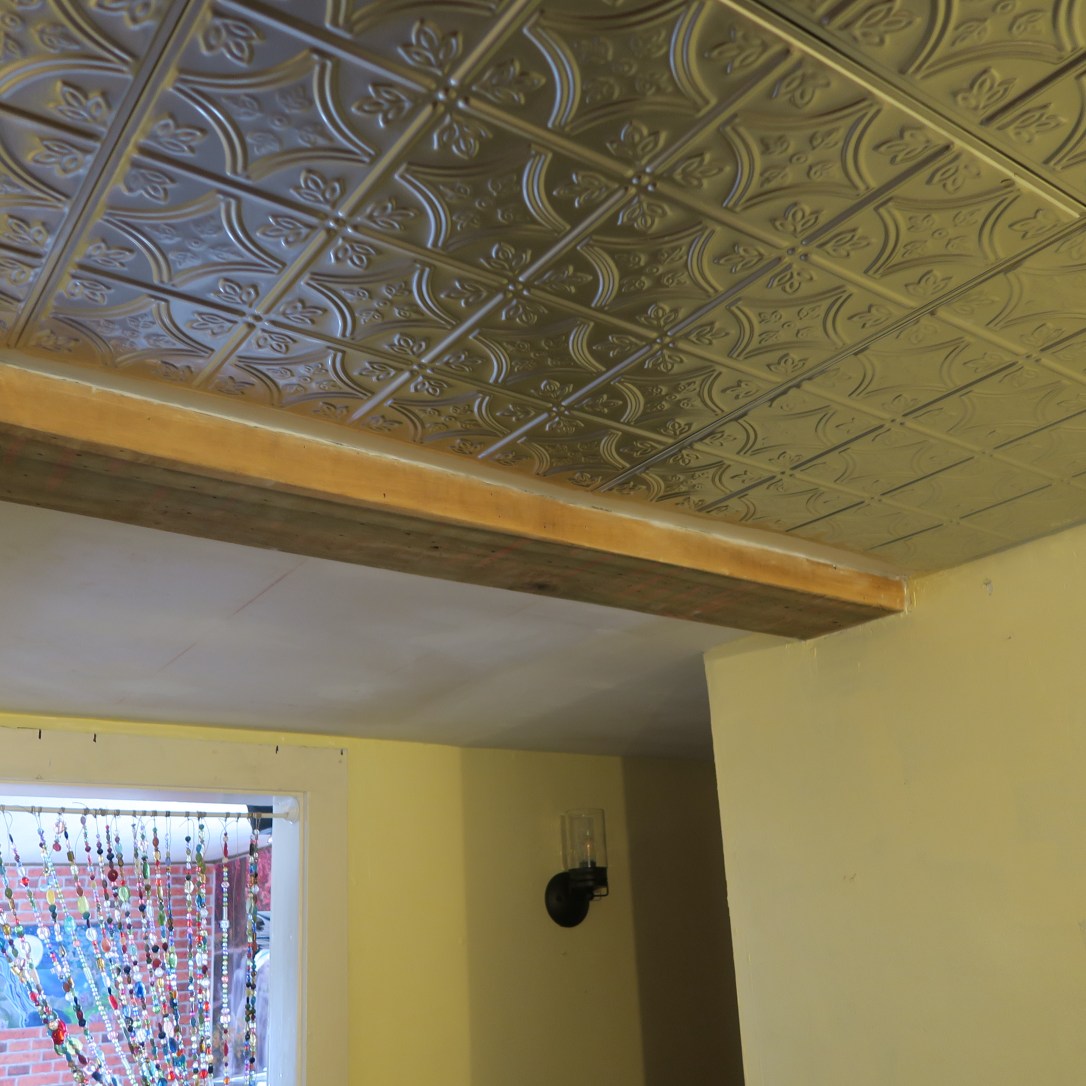
I have always wanted a tin ceiling in my kitchen. Finished panels come in a variety of colors and patterns but are pricey. I could however, buy them unfinished for about $10 each. I looked at Lowe’s and Home Depot’s plastic panels that mimic old fashioned tin but the plastic looked cheap to me, not at all authentic, and at $20+ per panel (a smaller sized panel) it was twice as expensive as the real thing. Of course purchasing unfinished tin meant it would need to treated to prevent rust. That was a messy project. Each 2 foot square panel had to be coated both back and front with an oil-based polyurethane. We only had space to work on six tins at one time. The polyurethane was slow to dry. It took days to complete all 40 tin panels. But once done, they looked fabulous and we’d probably saved $1000.
The tins I had purchased were a “snap lock” style. They cost $3 more per panel than traditional nail up tin squares, but they could be screwed directly into the drywall ceiling without adding wood strips. A panel is screwed to the ceiling on two sides and the next panel slides onto the first, hiding the screws. It was an easy system to work with. Three days later, our new ceiling was complete and cabinets could be rehung on the wall.
Tearing out the old plaster and installing drywall raised my ceiling by a good 2 inches. That led to more projects than we had anticipated. When my pine cabinets were rehung I wanted my center cabinet slightly higher. But that meant it no longer met the top of the tile backsplash. We would have to add a ceramic border to the top of the tiles. All of the built-in cabinets, walls, and trim that could not be removed had to be repainted. Wallpaper needed to be replaced in order to meet the new ceiling height. And if we were changing the wallpaper in the kitchen, well, the wallpaper in the breakfast nook needed to match so we would have to replace that too.
New light fixtures. Tiles. Paint. Wallpaper. Ceramic glue and grout. Wallpaper paste. Paint brushes. Ceiling tin. Screws. A gallon of polyurethane… My credit card began to smolder.
And then, as the kitchen began to look so fresh and beautiful, my husband and I began to assess the rest of the house. The floors in our living room and adjoining studio were original wood planks. We kept them covered with large rugs but around the perimeter we’d always had the problem of dust and dirt collecting between the planks. Trying to keep them clean was making me crazy. Since the house was already a construction zone mess, why not do the living room and studio floors too?
Even before the dining room and breakfast nook had been cleared of their kitchen overflow, the contents of my living room and studio were now being stacked onto the dining room table and shoved into kitchen corners. We made another trip to the flooring store to choose a pattern and purchase 300 ft. of laminate flooring. My husband replaced baseboard molding. It all got a coat of paint.
But it didn’t stop there. I had torn old carpet out of our sunroom several years ago and we had been living with the 1950s linoleum that I’d found underneath. It was time for a new floor in the sunroom as well. Another trip to the flooring store. More furniture shoved into corners. I was getting really tired of eating fast food and delivery pizzas.
I ordered new and smaller rugs that would allow our new floors to show. I had my home office furniture moved into a basement room in order to make our living space less crowded. I ordered new wallpaper for the dining room because, well, as long as every other room was being updated…
And now, with our entire first floor looking beautiful, there’s just one thing left to be done.
“We really need a new kitchen floor.”
